Monday, December 5, 2022

Twitchboard

 Previously I worked on a motor controller board that would deliver random pulses to a prop. It worked well, but I was not quite happy with the randomization algorithm, and I wanted more titratable control over the pulses. Additionally I wanted something that could be triggered by either a PIR sensor or a button.  

I’ve now produced a beta version of this new controller and I’m looking for feedback. Here’s a demo video—


This is the schematic—


And here is the code—

//  Jekyll-Labs Twitchy Attiny85
//  Built for Twitchboard v1.5
//
int fetpin = 0;
int trigpin = 1;
int potMpin = A1;
int potRpin = A2;
int potLpin = A3;
int lambda = 5; // number of event
int timeunit = 60; // in this time interval (sec)
unsigned long last = 0;
unsigned long timeinterval = 0;
float exprob=0;

void setup() {
  randomSeed(A1);
  pinMode(fetpin, OUTPUT);
  digitalWrite(fetpin, LOW);
  pinMode(trigpin, INPUT);
  pinMode(potLpin, INPUT);
  pinMode(potMpin, INPUT);
  pinMode(potRpin, INPUT);
}

void loop() {
  // duration of signal will last from 0.5 - 10 sec
  int durationpot = analogRead(potRpin);
  long duration = map(durationpot,100,1023,500,10000); 
  if (duration <500) duration = 150;

  // read middle pot for PWM of fet signal
  int PWMpot = analogRead(potMpin);
  int PWM = map(PWMpot,0,1000,0,255);
  if (PWM>255) PWM = 255;

  // mean frequency of random signals is 5 events per time unit
  int freqpot = analogRead(potLpin);
  int timeunit = map(freqpot,512,1023,60,300); // 2nd half dial range 1-5 min
  if (freqpot>1000) timeunit = 3600; // far right dial 1hr
  if (freqpot<512) timeunit = map(freqpot,0,512,0,60); // 1st half dial range 10-60 sec
  if (freqpot<100) timeunit = 0; // bottom of dial continous on  

  if (timeunit<=0){ // continuous on if left dial all counter clockwise
    analogWrite(fetpin,PWM);
  }
  
  else {
    // Check for trigger (X3 for debounce) and adjust
    // timeunit if trigger is positive.
    if (timeunit>0) {
      int trigger = digitalRead(trigpin);  
      if (trigger == HIGH) {
        delay(100);
        int trigger = digitalRead(trigpin);
        if (trigger == HIGH) {
          delay (100);
          int trigger = digitalRead(trigpin);
          if (trigger == HIGH) {
            timeunit = (duration * 10)/1000;
          }
        }
      }
    }
    
    // Calcuate time interval between events. timeunit depends on:
    // Potentiometer value if trig = 0 
    // Duration multiplier (shorter) if trig = 1
    unsigned long timeinterval = exprob * timeunit * 1000;    
    
    // Check if time interval has passed
    if ((millis() - last) > timeinterval) {
      last = millis(); // updates timer to last event
      analogWrite(fetpin,PWM);  
      delay(duration);
      digitalWrite(fetpin,LOW);
      // the following equation runs once per event and 
      // generates a random float (exprob) that falls in an 
      // exponential distribution. It will be used to
      // determine the interval time for the next event.
      // Events that occur at exponentially distributed  
      // intervals form poisson processes.
      exprob =  (-1)*(log((100-random(100))/100.00)/lambda);
    }
    else digitalWrite(fetpin,LOW);
  }
  delay(20);
}

Thursday, August 18, 2022

Lightboard

**Updates Log**

9/27/22 code updated for millis() rollover

2/3/23 parts list included


 So I’m, really happy about this new board I had made.


It uses a Arduino Nano to control PWM signals for six different channels of lights. There are two potentiometers, one to select the effect, and a second to change the speed of that effect. The board uses IRLB8721 mosfets to control current to the lights. According to Adafruit these mosfets are capable of switching 15A of current so each channel could run several lights in parallel.

These are the lights I use. They were suggested by another haunter, because they are waterproof, they fit inside a PVC fitting, and draw only 60mA at 12V DC. To find them you can search Eagle Eye LED 18mm on Amazon/EBay/AliExpress.


Here’s a 4 minute demo of the board in the lab:


There are 4 different effects:

1. Solid - all lights are on and dimmable by the speed potentiometer


2. Firelight - a low flicker meant to evoke the light of a fire. Works well with several amber on the same channel and 1 dim red on another channel


3. Wavey - All channels slowly pulse on and off at slightly different wavelengths so they don’t synchronize. Speed potentiometer controls how fast they pulse


4. Lightning  - Each channel strobes on with a random delay and a random number of flashes. Speed potentiometer controls how frequent the flashes are. 


**I'm not in the business of selling Halloween circuit boards, but I usually have to order more than I need for any given project. If you're into DIY electronics (and let's face it, you wouldn't be reading this otherwise), and want one of my boards, send me a PM.** 


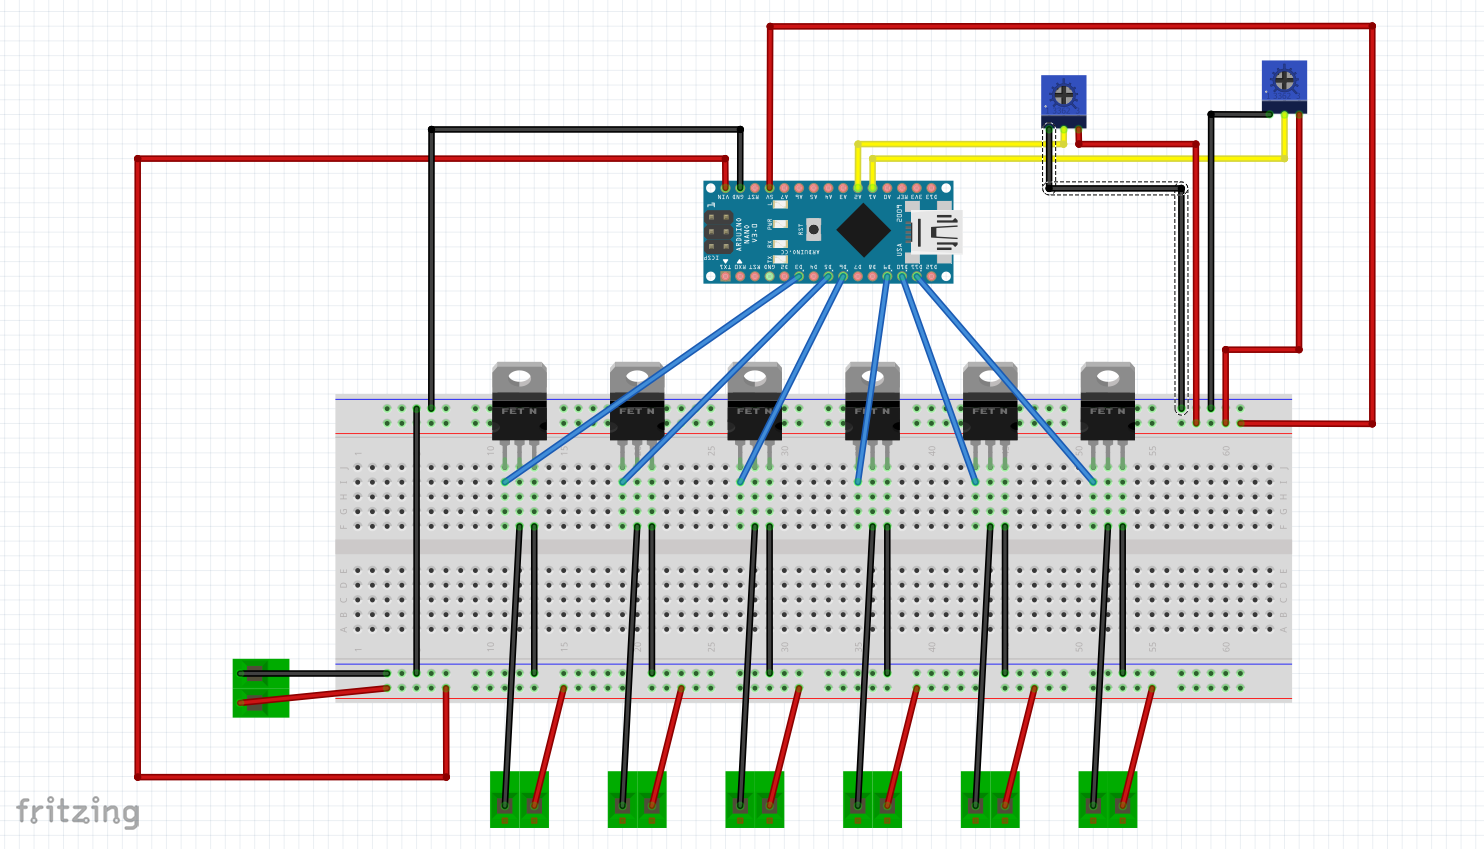
Here's the Fritzing:


The schematic:


Here's the code for the nano: (updated 9-27-22 to fix millis() rollover.)


// Jekyll-Labs Lightboard v1.0
//  D2 sensor
//  D3 Power MOSFET (PWM avail)
//  D4 sensor
//  D5 Power MOSFET (PWM avail)
//  D6 Power MOSFET (PWM avail)
//  D7 Unused
//  D8 Unused
//  D9 Power MOSFET (PWM avail)
//  D10 Power MOSFET (PWM avail)
//  D11 Power MOSFET (PWM avail)
//  D12 unused
//  D13 unused
//  A0/D14 Unused
//  A1/D15 10k potentiometer
//  A2/D16 10k potentiometer
//  A3/D17 Unused
//  A4/D18 Unused
//  A5/D19 Unused
//  A6/D20 Unused
//  A7/D21 Unused

int ledpin[] = {3, 5, 6, 9, 10, 11};
int effectpin = A1;
int freqpin = A2;
int effect = 0;
int freq = 0;
int brightness[6];
int oldbrightness[6];
int fldelay = 75; // fire light flicker delay
int flalpha = 20; // fire light alpha 0-100 (low values less dynamic changes)
unsigned long  lastupdate[6];
int between=500;
int randwavel[6];
int wavelength[6];

void setup() {
  Serial.begin(9600);
  randomSeed(A0);
  for (int i =0; i<=5; i++) {
    pinMode(ledpin[i],OUTPUT);
    digitalWrite(ledpin[i],LOW);
  }
  for (int i =0; i<=5; i++) {            //setting variables for flicker
    brightness[i]= random(256);
    oldbrightness[i] = brightness[i];
    randwavel[i] = random(500);
  }
  
}

void firelight(){
  for (int i =0; i<=5; i++) {
    if ((millis()-lastupdate[i])>fldelay) {
      lastupdate[i] = millis();
      brightness[i] = random(255);
      brightness[i] = (flalpha * brightness[i] + (100 - flalpha)*oldbrightness[i])/100; 
      oldbrightness[i] = brightness[i];
      analogWrite(ledpin[i],brightness[i]);
    }
  }
}

void wavey(){
  for (int i =0; i<=5; i++) {
    wavelength[i] = (freq/100)*1500 +1000 + randwavel[i];
    int remainder = millis() % wavelength[i];
    if (remainder <wavelength[i]/2){
      brightness[i] = map(remainder, 0, wavelength[i]/2,-128,384);
      if (brightness[i]<0) brightness[i]=0;
      if (brightness[i]>255) brightness[i]=255;
    }
    if (remainder >=wavelength[i]/2) {
      brightness[i] = map(remainder,wavelength[i]/2,wavelength[i],384,-128);
      if (brightness[i]<0) brightness[i]=0;
      if (brightness[i]>255) brightness[i]=255;
    }
    analogWrite(ledpin[i],brightness[i]);
  }  
}

void solid(){
  freq = map(freq,100,923,0,255);
  if (freq<0) freq=0;
  if (freq>255) freq=255;
  for (int i =0; i<=5; i++) {
    analogWrite(ledpin[i],freq);
  }
}

void lightning(){
  for (int i =0; i<=5; i++) {
    if ((millis() - lastupdate[i])> between) {
      for (int c=0; c< random(7); c++){ 
        digitalWrite(ledpin[i], HIGH); 
        delay(40); 
        digitalWrite(ledpin[i], LOW); 
        delay(10); 
      } 
      int lidelay = map(freq,0,1023,3000,20000);
      between = 500+ random(lidelay);
      lastupdate[i] = millis();
    }
  }  
}

void loop() {
  freq = analogRead(freqpin);
  effect = analogRead(effectpin);
  if (effect<100) solid();
  if ((effect>=100)&(effect<512)) firelight();
  if ((effect>=512)&(effect<923)) wavey();
  if (effect>=923) lightning();
  delay(10);
}

Parts List and links

Where convenient, I’m including links to parts on Digi-Key. I do not receive any commission from Digi-Key (or the parts fabricators), and I can’t vouch for the specific parts I link to. But I generally find Digi-Key to be very reliable with a good library of parts. You may find cheaper prices elsewhere.

1- Arduino nano
    Or suitable clone

2- 15 pin female headers
    Also can use a long strip of female headers and cut to fit

6 - N Channel Mosfets
    I like the IRLB8721PBF mosfet, but any logic level mosfet with enough volts should work. FQP30N06L is also a solid choice. 

2 - 10k Potentiometers
    Rather expensive here. There are cheaper ones elsewhere, but quality may be an issue.

7 - 2 channel 5.08mm pitch phoenix screw headers
    Any 5.08mm (0.2”) pitch screw terminal will work, but I really like the mechanism on the Phoenix product. 


Wednesday, August 17, 2022

Fake Electric Zap (capacitive touch)

Another Haunter on Facebook asked about making a barb wire fence that would make an "electric shock" noise when you touched it. That inspired me to put together a quick prop based on capacitive touch.


It’s pretty simple to put together. No Arduino involved. The sound comes from an Adafruit Sound FX board. They aren’t the cheapest option, but really easy to work with. I've saved a sound clip of electric shock to the board's memory as T01HOLDL.wav. This way it will play the sound whenever pin #1 is connected to ground. WAV files require less decoding so play faster. Pin #1 is hooked to the output from a capacitive touch sensor. The sensor is set to give a ground signal when you touch it, 5v when you don’t touch it. For this particular sensor, you need to add a glob of solder to connect the "A" pads.  I then scratched off some of the plastic covering the sensor and soldered a long wire to the sensor. That’s then connected to the outlet (which is of course NOT connected to household power or anything else.) 5V DC power from a wall wart transformer (or even 3 AA batteries) run to the power pins for both the sound board and touch sensor.


I highly recommend the Adafruit tutorial on their SoundFX boards. There are cheaper options for audio (DFPlayer mini is one of my favorites) but Adafruit is a great place to start. Adafruit also sells a great Capacitive Touch sensor board, but this one is cheaper and has the option to output ground signal with touch. 

Friday, July 1, 2022

Spider Victim with Random Twitching Movement

I wanted to show off a twitching victim I made for a friend's spider themed haunt. Here's a video of the prop in action.


The mechanism is based on an automatic car door lock motor like this:


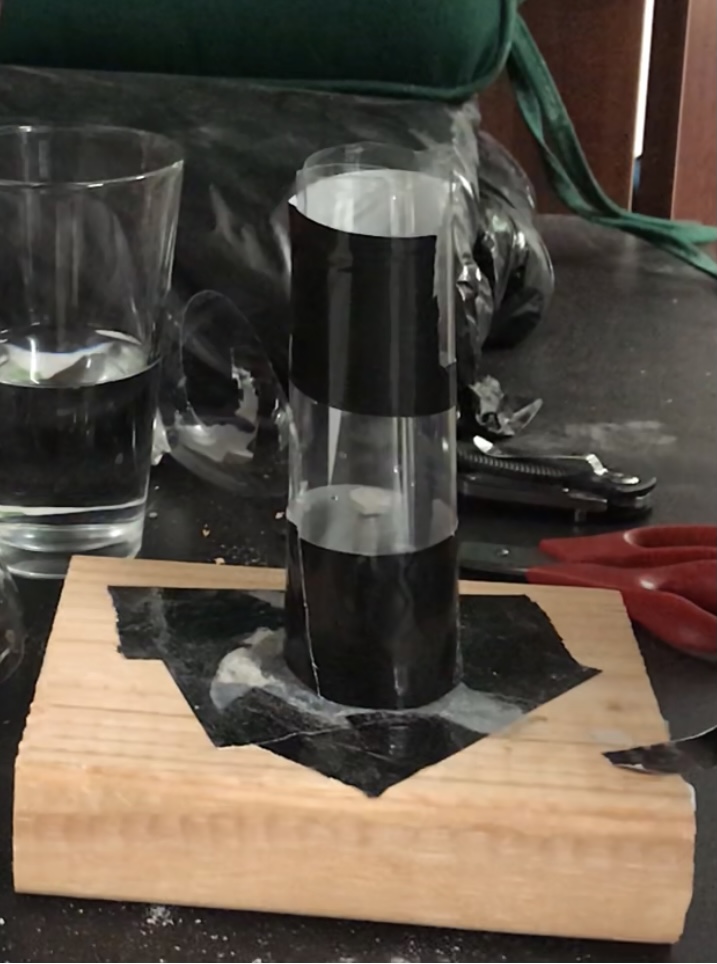
It's available on Amazon for about $6 and runs on 12v DC. Here are a couple close up pictures of the mechanics. 


The PVC and motor were then covered with plastic bags for bulk and then a couple layers of plastic treated with a heat gun to give the right corpsed/spun web appearance. 


This electronics for this project are an extension of a lighting simulator I made previously. For this project, the frequency of the random twitches are controlled by the potentiometer. The arduino sends 5 volt signals to the mosfet which in turn controls the 12 volt motor. 


To keep things small and cheap, I built the circuit based around an ATTINY85. These processors are great because they are very cheap (usually <$2) and programmable using the Arduino IDE. Here's a picture of the board. 


Alternatively this could be built with an arduino uno and mosfet as a simple first arduino project.


Here's the schematic for the circuit:


And here's the code: [code updated 8/29/22 to account for millis() rollover] 


//  Jekyll-Labs Twitchy Att
iny85
//  Built for Randflash board v1.1
// 
int fet = 0;
int pulses = 1;
int pot = A1;
unsigned long start = 0;

void setup() {
  // initialize digital pin LED_BUILTIN as an output.
  pinMode(fet, OUTPUT);
  randomSeed(A0);
}

// the loop function runs over and over again forever
void loop() {
  int potsens = analogRead(pot);
  if (potsens < 120) potsens = 0;
  unsigned long delaybonus = map(potsens,0,1023,0,600000);

  if ((millis() - start)>(3000 + delaybonus)){
    start = millis();
    pulses = random(3)+1;
    for (int i = 0; i < pulses; i++) {
      digitalWrite(fet, HIGH);   // turn the LED on (HIGH is the voltage level)
      delay(150);                       // wait for a second
      digitalWrite(fet, LOW);    // turn the LED off by making the voltage LOW
      delay(600);                       // wait for a second
    }
  }
  else {
    digitalWrite(fet,LOW);
  }
  delay(10);
}

Wednesday, June 22, 2022

Lightning Simulator

I decided to start playing with the Attiny85 processors because they are small, cute, and cheap. I love the arduino nano, but even the knockoff clones shipped from China are costing more than $5. I decided a great first project would be the lightning simulator. Here's a video of the final project:


Here is the Fritzing layout: (with 12v's worth of AA batteries and a single LED for the 12v light)


and the schematic:


After making it on a breadboard, I had a PCB printed to make the process more compact:


The code is Rob Tillaart's lightning code. Simple and effective.
// 
//    FILE: lightning.pde 
//  AUTHOR: Rob Tillaart 
//    DATE: 2012-05-08 
// 
// PUPROSE: simulate lighning POC 
// 
// 
#define BETWEEN 2579 
#define DURATION 43  
#define TIMES 7 
#define LEDPIN 0 
unsigned long lastTime = 0; 
int waitTime = 0; 
 
void setup() 
{ 
  randomSeed(analogRead(2));
  pinMode(LEDPIN, OUTPUT);  
} 
  
void loop() 
{ 
  if (millis() - waitTime > lastTime)  // time for a new flash 
  { 
    // adjust timing params 
    lastTime += waitTime; 
    waitTime = random(BETWEEN); 
  
    for (int i=0; i< random(TIMES); i++) 
    { 
      digitalWrite(LEDPIN, HIGH); 
      delay(20 + random(DURATION)); 
      digitalWrite(LEDPIN, LOW); 
      delay(10); 
    } 
  } 
   
  // do other stuff here 


} 

Monday, September 27, 2021

Electrical Connections — WAGO 221

Updated - New Post


I wanted to share a new method I’m using for making electrical connections in my yard holiday setup. I’ve been looking for something safe, waterproof and ideally modifiable/reusable for when I change my mind/layout.

I’m sure that others have discovered these previously, but I am loving the WAGO 221 lever nuts. Works for AWG 12-24, rated for mains mower amps/volts. Apparently more common in Europe for household wiring, but also certified by UL for household wiring in the US. I’m only using them for 12V 5A DC circuits, but it’s nice to know they’ve been well tested.

I’m using 18g landscaping “lamp” wire and 35mm film canisters for my junction boxes. Here are a few pictures of my set up. 

*I have no financial connection with any of this. Just sharing something that works well for me. 
** I’ve also tried a similar product that I found on Ali-express. It is much cheaper. But also much lower quality. Perfectly fine for throwing something together, but the wires fit in less well. I’d also never use it with mains power.


Monday, May 31, 2021

PVC Shop Vac Adapter

So, it would be lovely if shop vac hoses came in a size that mated well with PVC pipe. Alas, this just isn't so. 

 There are basically three options:

1) Proprietary adapter

        Expensive, not available, still may not work well.

2) Use a flexible coupler outside both pipe and hose

        Works, but looks a little unfinished

3) Make an adapter yourself

        Use a hot air gun and concrete mold


Here's a not so quick video of the process.


1) anchor bolt to scrap wood


2) Make a cone shaped mold out of a PET soda bottle and some tape. 


3) put mold on top of bolt and fill mold with concrete.


4) wait for concrete to harden completely (several days)

5) remove plastic mold. 

6) Use heat gun to soften PVC


7) stretch PVC over concrete mold and allow to cool. 


Color PVC

PVC is a great material. It's lightweight, relatively cheap, and easily obtainable at your nearest box store. One of the main problems with PVC, though is the color. Most of the big box stores will only cary plumbing PVC in white and electrical conduit PVC in grey. Other colors of "structural" PVC can be ordered, but it's expensive and hard to find. You can also try and paint PVC, but it is messy, and often flakes off. 

The best solution that I have seen is the technique of "staining" PVC that I first saw here in MAKE magazine.

The technique is pretty simple and basically similar to the purple primer we use prior to joining fittings for plumbing PVC. It turns out, Oatey PVC Clear Cleaner can be stained a variety of nice colors with petroleum dyes.


These petroleum dyes are commonly used to add color to kerosine for lamps, and for coloring gasoline in industrial applications. The quickest way to get your hands on some is searching ebay for petroleum dye or Rekhaoil dye. I purchase mine from this retailer. One ounce goes a long way (20-30 ounces of Clear Cleaner.)

Add a small amount of dye to the can and test on a scrap piece of PVC. Once you are happy with the color, use the can's applicator or a sponge paint brush to apply to PVC. Remember these products should only be used in a well ventilated place (outdoors). I also use double nitrile gloves or thick dishwashing gloves as this will be absorbed through your skin and stain your hands a lovely color. 


Solder Station Fumes Extractor


Soldering is great, but the fumes, less so. The link between solder fumes and asthma is clear. More fumes, more asthma. Breathing (and eating) lead is also not recommended. The newer lead-free solder compounds may be safer in some ways, but also contain other likely harmful substances that we are better off without. 

Soldering can produce smoke with particulate matter, volatile organics, and other noxious gases. A good system should both filter out the particulate matter, and then exhaust the remainder to the outside. 

This system uses a shop vac with hepa filter to provide local suction and manage particulate matter. Exhaust from the shop vac is then fed into an exhaust fan that is ducted to the outside.


Here's a video of the system in operation:


The core of the system is a good exhaust fan. This fan handles my solder exhaust, but can also improve the ventilation of my work room in general. If you are trying to exhaust the entire room, you should probably calculate the "air changes per hour". A good number for ventilation is 8-20 air changes per hour. You can do the math, but for 8 air changes per hour a good rule of thumb is 1 CFM per square foot. At a minimum, the CFM for the exhaust fan needs to be higher than the CFM for the shop vac.


I use this one Vivosun Exhaust Fan. It seems to be used primarily by indoor marijuana cultivators so can move lots of air, relatively quietly. 

I use a combination of PVC pipe and metal ductwork for the exhaust unit. This let me create a well sealed hole through the wall as well as using a cleanout fitting to completely seal the exhaust vent when not in use.


The particulate matter filtration and suction boost is handled by a shop vac with HEPA filter. I use this 4.25 HP Rigid Shop Vac from Home Depot, but you can use whichever one you already have. It's a bit noisy, but works well. The main suction hose attaches to the PVC suction arm. A second hose from the shop vac exhaust rests inside the intake vent for the exhaust fan. 

The desktop suction arm is made from PVC. In order to attach the shop vac hose to the PVC, I had to dilate the last pipe a bit. I used the same technique for adapting my shop vac to serve as a dust collector for my miter saw. 

I created a cone shaped mold out of cement to dilate the PVC pipe. Here's a link with a video to show the process.

Finally, I stained the PVC black to match the decor of my work shop. 


Saturday, October 31, 2020

Mr. Funnybones


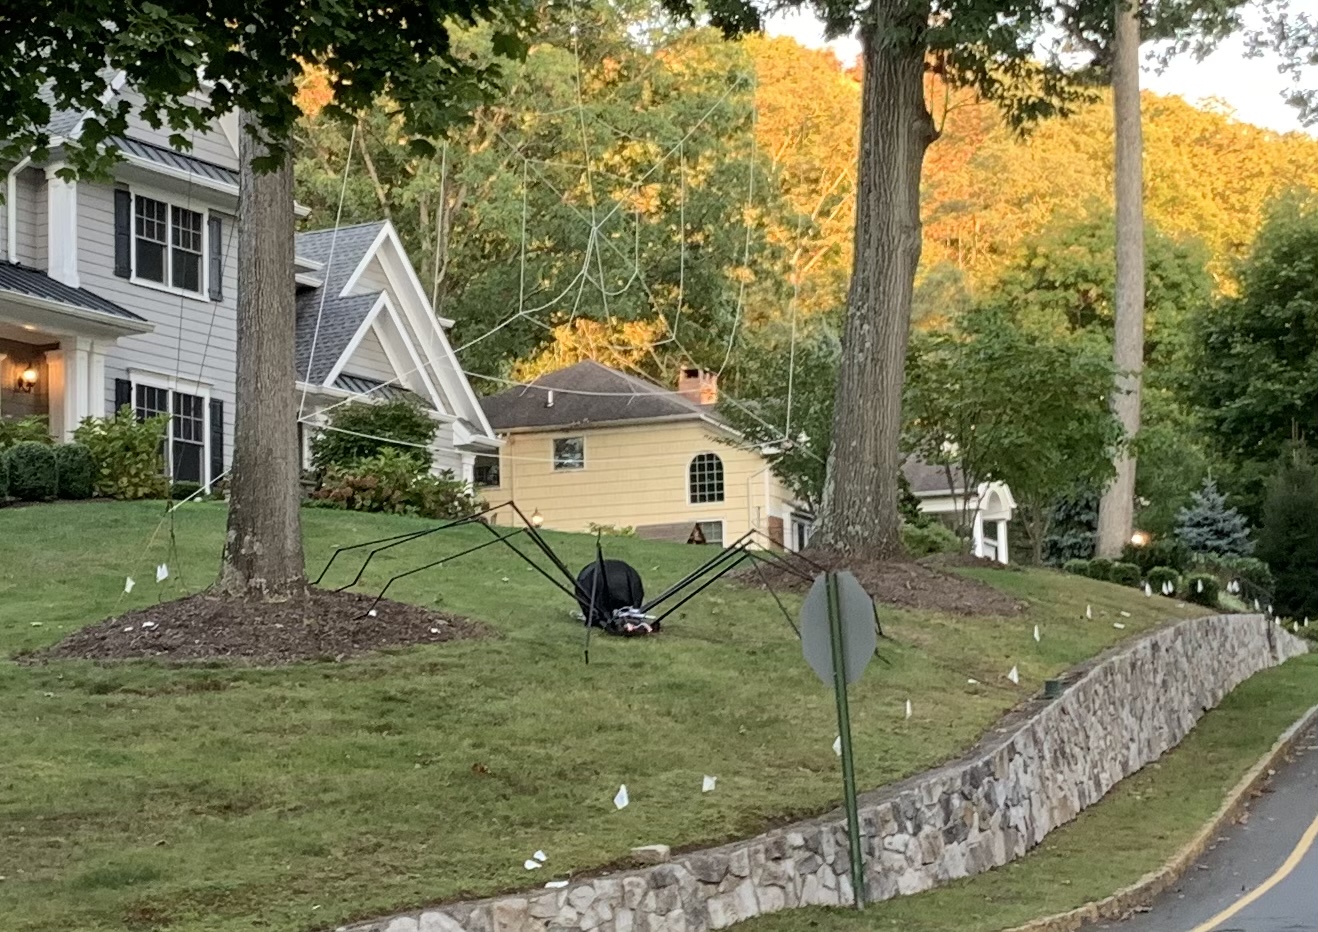
The Spider (Halloween 2020)


 This is a Halloween prop from 2020. When the motion sensor is triggered, it moves its front legs and makes "spider noises" (some of which are actual recordings of wolf spiders.)

Here are some more still images.


The electronics for the spider run off an Arduino. (Plus Adafruit AudioFX board, a motion sensor, and a few relays). 


Thursday, October 31, 2019

I see you - Halloween 2019


This prop was a lot of fun. A combination of motion sensors, some LEDs and a servo motor let the skull light up and look towards movement. If you walk past, its head will continue to swivel and follow you. I had five of these stationed along our front walk.